이전 글에서는 프로젝트 구조와 이미 구현되어 있는 signup 과정을 맛보기로 둘러보았습니다.
이번 글에서는 실제 요건을 하나씩 해결해보려 합니다.
요건 1. API 응답 포맷
정상처리 및 오류처리에 대한 API 서버 공통 응답 포맷을 아래와 같이 정의합니다.
- 정상처리 및 오류처리 모두 success 필드를 포함합니다.
- 정상처리라면 true, 오류처리라면 false 값을 출력합니다.
- 정상처리는 response 필드를 포함하고 error 필드는 null입니다.
- 응답 데이터가 단일 객체라면, response 필드는 JSON Object로 표현됩니다.
- 응답 데이터가 스칼라 타입(string, number, boolean)이라면, response 필드는 string, number, boolean로 표현됩니다.
- 응답 데이터가 Array라면, response 필드는 JSON Array로 표현됩니다.
- 오류처리는 error 필드를 포함하고 response 필드는 null입니다. error 필드는 status, message 필드를 포함합니다.
- status : HTTP Response status code 값과 동일한 값을 출력해야 합니다.
- message : 오류 메시지가 출력됩니다
1.1. 로그인 성공 응답 예시
{
  "success": false,
  "response": null,
  "error": {
    "status": 400,
    "message": "이메일은 필수입니다."
  }
}
1.2. 로그인 실패 응답 예시
- 로그인 이메일 누락 (HTTP STATUS 400)
{
  "success": false,
  "response": null,
  "error": {
    "status": 400,
    "message": "이메일은 필수입니다."
  }
}- 로그인 이메일/비밀번호 미일치 (HTTP STATUS 401)
{
  "success": false,
  "response": null,
  "error": {
    "status": 401,
    "message": "이메일 또는 비밀번호가 다릅니다."
  }
}
서버의 응답(response) 형식을 공통되게 변경하면 됩니다.
이전 글에서 살펴봤다시피 request-handler에서 wrap 함수로 controller의 응답을 한번 필터링(?) 해서 응답을 전송합니다.
성공 응답은 여기에서 작업하고 실패 응답은 error.middleware.ts 에서 수정합니다.
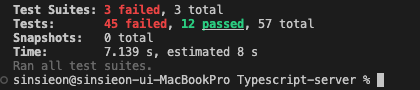
우선 아무것도 하지 않고 테스트를 진행해 봅니다.
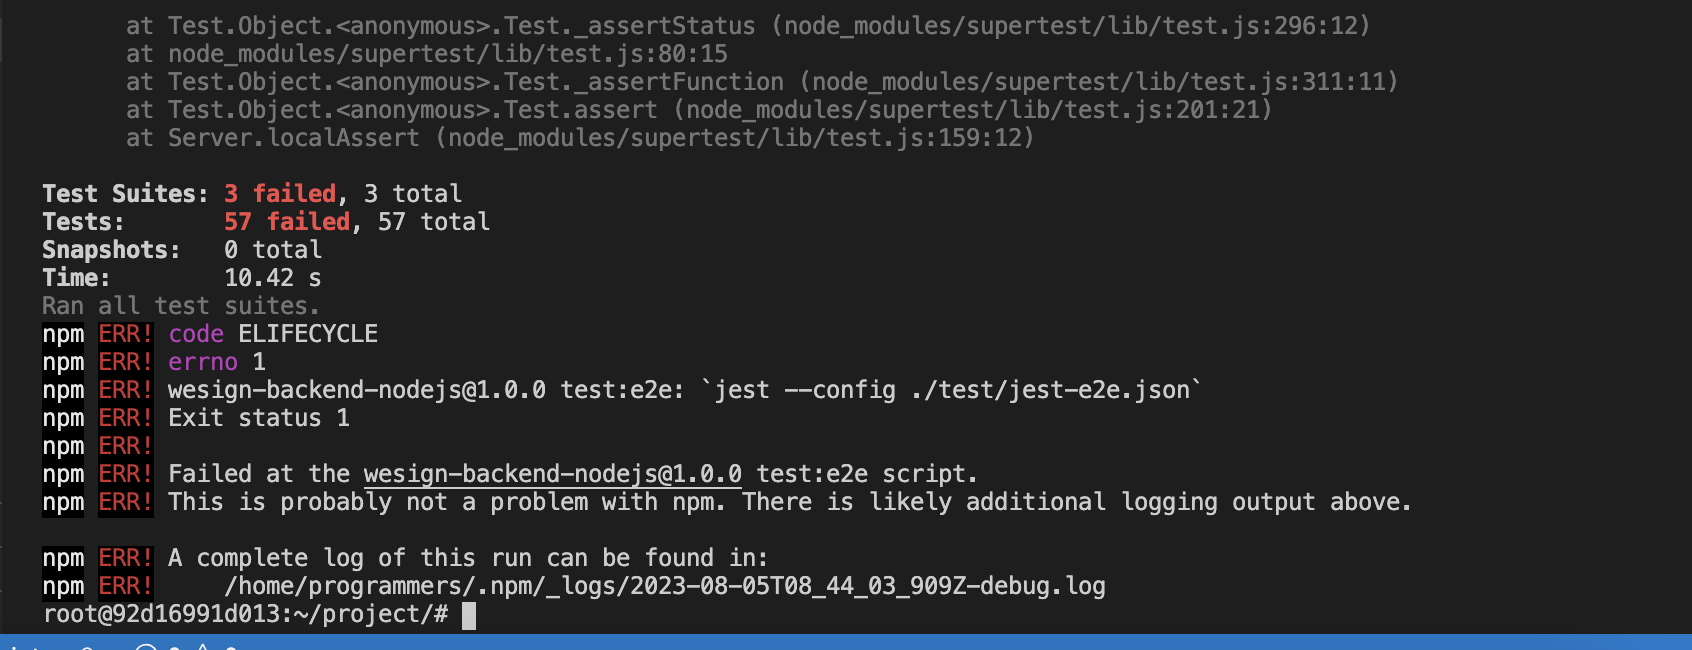
총 세 개의 테스팅 파일과 57개의 유닛테스트를 진행합니다.
가장 먼저 진행하는 테스트를 보면 response응답에 success라는 필드가 있는지 검사합니다.
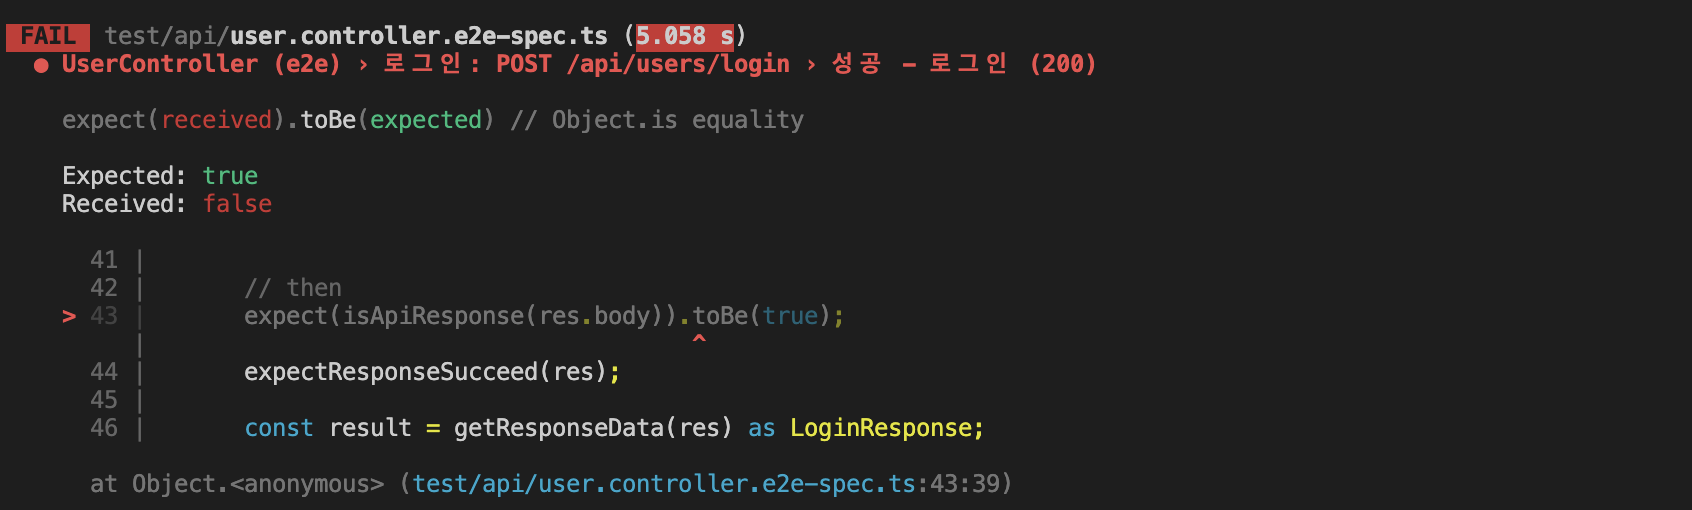
export function isApiResponse(body: Record<string, any>) {
  return typeof body.success === 'boolean';
}
이와 관련된 테스트는 57개 중 두 개입니다. 만약 이 요건을 처리하면 2개는 성공해야 합니다.
//request-handler.ts
export const wrap =
  (handler: Handler) =>
  async (req: Request, res: Response, next: NextFunction) => {
    try {
      const response = await handler(req, res, next);
      const wrapResponse = {
        success: true,
        response: response,
        error: null,
      };
      res.json(wrapResponse);
      next();
    } catch (err) {
      next(err);
    }
  };
//error.middleware.ts
import { ErrorRequestHandler } from "express";
import { HttpException } from "../common/exceptions/http.exception";
export const errorMiddleware: ErrorRequestHandler = (
err: HttpException,
req,
res,
next
) => {
const status = err.status || 500;
const message = err.message;
res.status(status).send({
success: false,
response: null,
error: { status, message },
});
next();
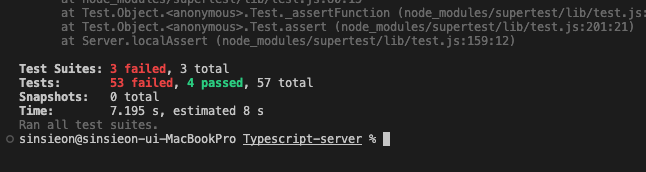
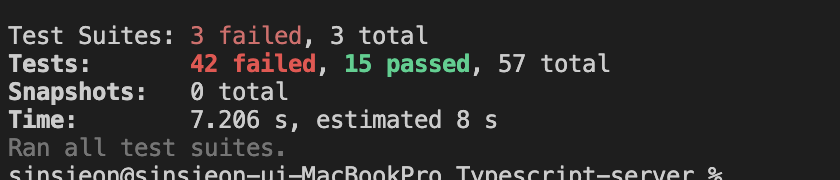
};수정 후 테스트를 진행해 보면 2개가 성공된 걸 볼 수 있습니다.

요건 2. 공개용 API 및 인증 사용자용 API 구분
API는 사용자가 로그인하지 않아도 호출할 수 있는 공개용 API와 로그인 후 호출할 수 있는 로그인 사용자용 API 그리고 참가자 인증 후 호출할 수 있는 참가자용 API로 구분됩니다.
- 공개용 API는 이미 작성이 되어 있으니 개발 시 참고해 주세요.
- 로그인 사용자 인증 정보로 참가자용 API를 호출할 수 없습니다. 참가자 인증 정보도 로그인 사용자용 API를 호출할 수 없습니다.
- 인증 사용자용 API를 호출하기 위해 요청 헤더에 Authorization 항목을 추가하고, 값으로 로그인 후 전달받은 token에 Bearer 키워드를 앞에 붙여 입력합니다.
인증 사용자용 API 호출 시 Authorization헤더가 누락되거나 값이 올바르지 않다면 아래와 같은 오류 응답이 발생해야 합니다.
{
  "success": false,
  "response": null,
  "error": {
    "status": 401,
    "message": "인증 자격 증명이 유효하지 않습니다."
  }
}
API
- 공개용 API
- 가입: POST /api/users/signup
- 로그인: POST /api/users/login
- 참가자 인증: POST /api/participant/token
- 로그인 사용자용 API
- 문서 생성 POST /api/documents
- 문서 읽기 GET /api/documents/{documentId}
- 문서 삭제 DELETE /api/documents/{documentId}
- 문서 발행 POST /api/documents/{documentId}/publish
- 문서 목록 GET /api/documents
- 참가자용 API
- 참가자 문서 읽기 GET /api/participant/document
- 참가자 싸인 POST /api/participant/sign
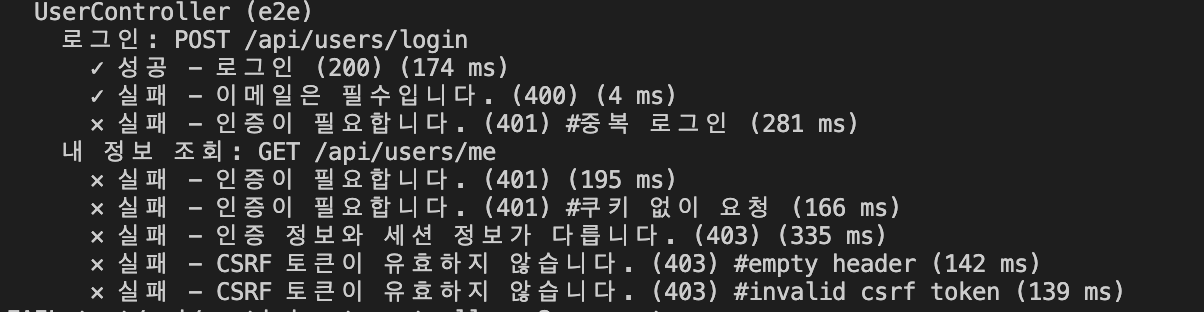
로그인 사용자용 API를 호출 시 요청 헤더에 authorization 필드값이 없거나 값이 올바르지 않은지를 체크해서 (401) UnauthorizedError를 발생시키면 됩니다
로그인 사용자용 API는 api/documents 에 한합니다. 따라서 document.controller.e2e-spec.ts에서 인증여부를 체크하는 유닛 테스트 케이스를 검색해 본 결과 총 5개입니다.
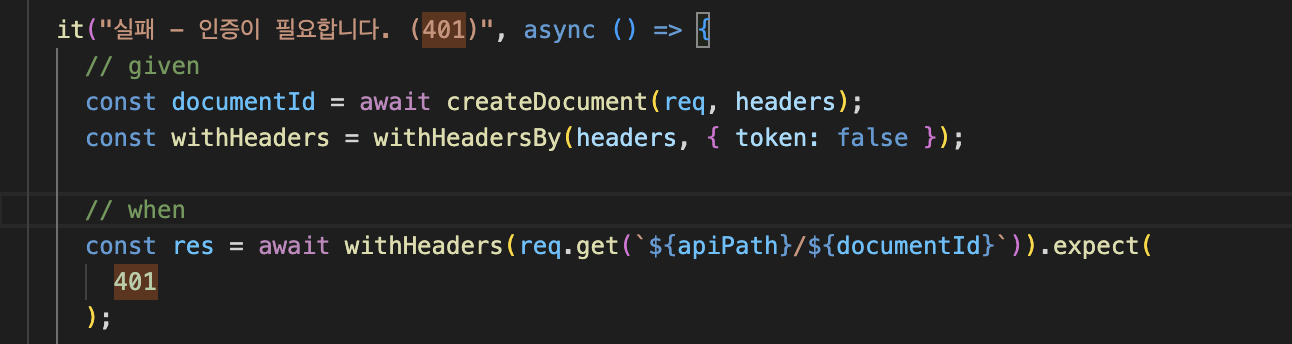
/api/documents 에 대한 검사만 진행하면 되기 때문에 document.controller.ts 에서 헤더의 authorization 필드를 검사하는 로직을 추가합니다.
//document.controller.ts
checkValidatedUser = (req) => req.headers.authorization;

create: Handler = (req, res) => {
    if (!this.checkValidatedUser(req)) throw new UnauthorizedException();

};
5개의 유닛 테스트 중 3개는 인증 여부 외의 체크를 진행하기 때문에 2개만 우선 통과했습니다.
요건 3. API 구현
- state-machine을 활용해서 문서와 참가자의 상태를 처리해 주세요.
- 계약과정에서 일어나는 액션에 대한 히스토리를 저장해 주세요.
schema.sql에서 document_histories와 participant_histories 테이블을 참고해 주세요.- JSON 데이터 타입은 JSON.stringify()로 넣어야 합니다.
- data에는 새로 생성되거나 변경되는 정보만 넣어주세요.
- type은 API 명세를 확인해 주세요.
3-1 DocumentController.create메서드를 구현하세요
문서를 생성합니다.
- 로그인 사용자만 호출할 수 있습니다.
- 제목과 내용은 필수입니다.
- 참가자 이름과 이메일은 필수입니다.
- 참가자 이메일은 이메일 형식이어야 합니다.
- 참가자는 최소 2명 최대 10명까지 등록이 가능합니다.
- 문서 ID는 uuid를 이용해서 생성합니다. (UserService.signUp 메서드를 참고해 주세요.)
- 문서 상태는 CREATED로 저장합니다.
- 참가자 목록을 문서 ID와 함께 참가자 ID를 UUID로 생성해서 participants 테이블에 CREATED 상태로 저장합니다.
- 문서 히스토리와 참가자들 히스토리 타입을 CREATE로 저장합니다.
Exception:
- 인증 정보가 없는 경우 (401)
- 제목 또는 내용이 없는 경우 (400)
- 참가자의 이름 또는 이메일이 없는 경우 (400)
- 참가자의 이메일 값이 이메일 형식이 아닌 경우 (400)
- 참가자의 이메일이 중복으로 들어가 있는 경우 (400)
- 참가자가 2명 미만이거나 10명을 초과한 경우 (400)
//request
{
  "title": "계약서",
  "content": "매우 긴 내용",
  "participants": [
    {
      "name": "참가자",
      "email": "email@example.com",
    },
    ...
  ]
}
//response
{
"success": true,
"response": {
"documentId": "05a05180-c6bb-11eb-b8bc-0242ac130003"
},
"error": null
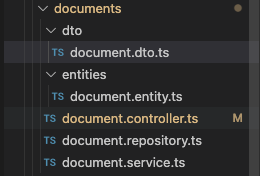
}이제 document api를 개발해야 합니다. 앞서 user, participant api와 같이 dto 파일과 entity 파일을 생성하고
document.repository.ts, document.service.ts를 만들어줍니다.
document.dto.ts 는 3-1 create api에 전송되는 request 객체와 response 객체에 보이는 필드에 따라 작성합니다.
import { UUID } from "../../../@types/datatype";
import { ParticipantInDoc } from "../../participant/entities/participant.entity";

export interface DocumentDto {
  title: string;
  content: string;
  participants: ParticipantInDoc[];
}
export type DocumentResponse = UUID;


//Participant.entity.ts
export interface ParticipantInDoc {
  name: string;
  email: Email;
}
그리고 document.controller.ts 에서 create 메서드를 채워줍니다. (조건 검사를 추가합니다.)
create: Handler = (req, res) => {
    if (!this.checkValidatedUser(req)) throw new UnauthorizedException();

    const { title, content, participants } = req.body as DocumentDto;
    const user_id = req.session.email;

    if (!title || !content) {
      throw new BadRequestException("제목 또는 내용이 없습니다.");
    }
    let email = "";
    if (participants.length > 10 || participants.length < 2)
      throw new BadRequestException(
        "참가자가 2명 미만이거나 10명을 초과합니다."
      );
    for (const participant of participants) {
      if (!participant.name || !participant.email) {
        throw new BadRequestException("참가자의 이름 또는 이메일이 없습니다.");
      }
      if (email === participant.email)
        throw new BadRequestException("참가자의 이메일이 중복되었습니다.");
      else email = participant.email;

      if (!validEmailCheck(participant.email))
        throw new BadRequestException(
          "참가자의 이메일 값이 이메일 형식이 아닙니다."
        );
    }
    const documentId = this.documentService.createDocument({
      user_id,
      title,
      content,
    });
    //문서 생성과 동시에 참가자 목록을 participants 테이블에 저장해야 합니다.
    //participant.service.ts의 createParticipant 함수를 생성합니다.
    this.participantService.createParticipant(
      participants,
      documentId
    );
    return documentId;
  };
앞서 document.controller.e2e-spec.ts 에서 입력된 데이터를 검증하는 테스트는 총 8개가 충족된 걸 볼 수 있습니다.
이제 실제 문서를 생성해 줄 서비스인 document.service.ts 와 데이터베이스에 저장해 줄 document.repository.ts, 데이터베이스와 주고받는 데이터의 타입을 정의한 document.entity.ts를 작성합니다.
//document.service.ts
import { DocumentDto } from "./dto/document.dto";
import { DocumentRepository } from "./document.repository";
import { v4 as uuidv4 } from "uuid";
import { UUID } from "../../@types/datatype";

export class DocumentService {
  constructor(private readonly documentRepository: DocumentRepository) {}

  createDocument({ user_id, title, content }): DocumentResponse {
    const id: UUID = uuidv4();
    const now = new Date().toISOString();
    const status = "CREATED";
    this.documentRepository.create({
      id,
      user_id,
      title,
      content,
      status,
      created_at: now,
      updated_at: now,
    });
    return id;
  }
 }
//document.repository.ts
import { db } from "../../lib/database";
import { Repository } from "../../common/interfaces/repository.interface";
import { UUID } from "../../@types/datatype";
import {
Document,
DocumentHistoryRaw,
DocumentRaw,
} from "./entities/document.entity";
export class DocumentRepository implements Repository {
tableName = "documents";
create(raw: DocumentRaw) {
//document 를 생성합니다.
const result = db
.prepare(
[
"INSERT INTO",
this.tableName,
"(id, user_id, title, content, status, created_at, updated_at)",
"VALUES",
"($id, $user_id, $title, $content, $status, $created_at, $updated_at)",
].join(" ")
)
.run(raw);
return;
}
}document를 Insert 한 뒤엔 참가자 목록을 participant 테이블에 저장해야 합니다.
participant.service.ts 와 participant.repository.ts 에 참가자를 INSERT 할 수 있는 로직을 구현합시다.
//participant.service.ts
createParticipant(participants: ParticipantInDoc[], document_id: UUID) {
    const now = new Date().toISOString();
    const participants_: ParticipantRaw[] = participants.map((participant) => {
      const id: UUID = uuidv4();
      const { name, email } = participant;
      const status = "CREATED";
      const signature = "";
      const created_at = now;
      const updated_at = now;
      return {
        id,
        document_id,
        name,
        email,
        status,
        signature,
        created_at,
        updated_at,
      };
    });
    this.participantRepository.create(participants_);
    return;
  }
//participant.repository.ts
create(participants: ParticipantRaw[]) {
const result = db.prepare(
[
"INSERT INTO",
this.tableName,
"(id, document_id, name, email, status, signature, created_at, updated_at)",
"VALUES",
"($id, $document_id, $name, $email, $status, $signature, $created_at, $updated_at)",
].join(" ")
);
const many = db.transaction((participants) => {
for (const participant of participants) {
result.run(participant);
}
});
many(participants);
}//participant.entity.ts
export interface ParticipantInDoc {
name: string;
email: Email;
}
테스트를 돌려줍니다.
인증 여부 유닛 테스트 5개 중 앞서 2개를 통과했고 나머지 3개를 마저 통과한 걸 볼 수 있습니다.
중간 점검을 하기 위해 테스팅 보고서를 출력해 봅니다.

아직 갈길이 멀었네요.. 차근차근 다시 한번 가봅시다.
3-2 문서 읽기
3-2 DocumentController.read 메서드를 구현하세요.
문서를 DB에서 읽어서 리턴합니다.
- 로그인 사용자이고 문서의 소유자만 호출할 수 있습니다.
- 참가자들의 서명은 응답에 포함하지 않도록 해주세요.
MethodURL
| GET | /api/documents/{documentId} |
Param:
- documentId: 문서 ID
Response Body:
{
  "success": true,
  "response": {
    "document": {
      "id": "05a05180-c6bb-11eb-b8bc-0242ac130003",
      "title": "계약서",
      "content": "매우 긴 내용",
      "status": "PUBLISHED",
      "participants": [{
        "id": "b24aee27-1c6c-4294-a4fa-49cf11ea442f",
        "name": "참가자",
        "email": "email@example.com",
        "status": "INVITED",
        "createdAt": "2021-06-10T10:00:00.000Z",
        "updatedAt": "2021-06-11T10:00:00.000Z",
      }],
      "createdAt": "2021-06-10T10:00:00.000Z",
      "updatedAt": "2021-06-11T10:00:00.000Z",
    }
  },
  "error": null
}
Exception:
- 인증 정보가 없는 경우 (401)
- 문서의 소유자가 아닌 경우 (403)
- 문서 ID가 올바르지 않은 경우 (404)
- 문서를 찾을 수 없는 경우 (404)
문서 읽기 기능을 개발해야 합니다. Exception은 총 네 개인데, 인증 정보가 없는 경우는 앞서서 구현했으니 넘어가고
문서의 소유자가 아닌 경우는 session에 담긴 이메일과 document의 user_id를 비교해서 다르면 ForbiddenException을 발생시킵니다. 그리고 유닛 테스트 케이스를 보면 문서 id에 적절하지 않은 문자열을 넣어놓았습니다. 이를 검증하고 문서가 없으면 NotFoundException을 발생시킵니다.
특이한 점은 participants의 속성 중 signature을 뺀 값을 보내야 합니다.
//document.controller.ts
findOne: Handler = (req, res) => {
    if (!this.checkValidatedUser(req)) throw new UnauthorizedException();
    const { documentId } = req.params;
    if (!documentId || documentId === "not-found-document-id")
      //문서 ID가 올바르지 않은 경우
      throw new NotFoundException();

    const document = this.documentService.readDocument(documentId);
    if (!document) throw new NotFoundException(); //문서가 존재하지 않는 경우

    if (req.session.email !== document.user_id) throw new ForbiddenException(); //문서의 소유자가 아닌 경우

    let docWithParts: DocumentWithParticipants = { ...document }; //DocumentRaw type에 Participants 필드를 붙인 타입

    let participantsWithoutSign =
      this.participantService.findByDocumentId(documentId); //documentId로 참가자를 찾는다.

    docWithParts.participants = participantsWithoutSign;

    return { document: docWithParts };
  };
//document.service.ts
readDocument(id: UUID): DocumentRaw {
const document = this.documentRepository.select(id);
return document;
}//document.repository.ts
select(id: UUID) {
const result: DocumentRaw = db
.prepare(`SELECT * FROM ${this.tableName} WHERE id = ?`)
.get(id);
return result;
}이제 participant.service.ts 와 repository, entity.ts를 살펴보면
//participant.service.ts
findByDocumentId(documentId: UUID): ParticipantWithoutSign[] {
    let participants_: ParticipantWithoutSign[] = []; //signature을 없앤 타입
    const participants =
      this.participantRepository.findByDocumentId(documentId);
    for (let i = 0; i < participants.length; i++) {
      const { signature, ...rest } = participants[i];
      participants_.push(rest);
    }
    return participants_;
  }
한 문서에 참가자는 여려 명이 있을 수 있고 signatur이 없어야 하므로 entity.ts에 ParticipantWithoutSign 타입을 정의합니다.
//participant.entity.ts
export type ParticipantWithoutSign = Omit<ParticipantRaw, "signature">;
participant.repository.ts 에는 document_id로 참가자 목록을 찾을 수 있는 쿼리문을 구현합니다.
//participant.repository.ts
findByDocumentId(document_id: UUID) {
    const raw: ParticipantRaw[] = db
      .prepare(`SELECT * FROM ${this.tableName} WHERE document_id = ?`)
      .all(document_id);

    return raw;
  }
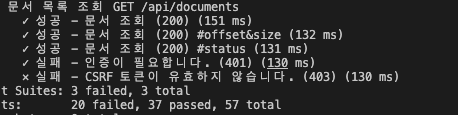
테스트를 돌려봅니다.

문서 조회 관련 유닛 테스트 다섯 건을 성공해 총 20건의 테스트를 성공했습니다!
3-3. 문서 삭제
DocumentController.remove 메소드를 구현하세요.
문서를 삭제합니다.
- 로그인 사용자이고 문서의 소유자만 호출할 수 있습니다.
- 문서의 상태가 CREATED인 경우에만 삭제할 수 있습니다.
- 문서와 참가자들의 상태를 DELETED로 업데이트하는 논리 삭제를 합니다.
- 이미 삭제 상태인 경우 DB 업데이트를 하지 않고 성공 처리합니다.
- 문서 히스토리와 참가자들 히스토리 타입을 DELETE로 저장합니다.
MethodURL
| DELETE | /api/documents/{documentId} |
Param:
- documentId: 문서 ID
Response Body:
{
  "success": true,
  "response": true,
  "error": null
}
Exception:
- 인증 정보가 없는 경우 (401)
- 문서의 소유자가 아닌 경우 (403)
- 문서 ID가 올바르지 않은 경우 (404)
- 문서를 찾을 수 없는 경우 (404)
- 문서의 상태가 CREATED가 아닌 경우 (400)
Request와 Exception이 Read와 비슷하네요.
//document.controller.ts
remove: Handler = async (req, res) => {
    if (!this.checkValidatedUser(req)) throw new UnauthorizedException();
    const { documentId } = req.params;
    if (!documentId || documentId === "not-found-document-id")
      //문서 ID가 올바르지 않은 경우
      throw new NotFoundException();

    const document = this.documentService.readDocument(documentId);
    if (!document) throw new NotFoundException(); //문서가 존재하지 않는 경우

    if (req.session.email !== document.user_id) throw new ForbiddenException(); //문서의 소유자가 아닌 경우

    if (document.status === "CREATED") { //CREATED인 참가자만 변경합니다.
      const result = await this.documentService.removeDocument(documentId);
      const partsResult =
        await this.participantService.removeByDocumentId(documentId); //참가자의 상태도 변경해줍니다.
      return result && partsResult;
    } else {
      if (document.status === "DELETED") return true;
      else {
        throw new BadRequestException();
      }
    }
  };
//document.service.ts
async removeDocument(id: UUID): Promise<boolean> {
    const result = await this.documentRepository.remove(id);
    return true;
  }

//participant.service.ts
async removeByDocumentId(documentId: UUID): Promise<boolean> {
    const result = await this.participantRepository.remove(documentId);
    return result;
  }
//document.repository.ts
remove(document_id: UUID) {
const result = db
.prepare(
["UPDATE", this.tableName, "SET status=? WHERE id = ?"].join(" ")
)
.run("DELETED", document_id);
return true;
}
//participant.repository.ts
remove(document_id: UUID) {
const result = db
.prepare(
["UPDATE", this.tableName, "SET status = ? where document_id = ?"].join(
" "
)
)
.run(["DELETED", document_id]);
return true;
}
매개변수는 document_id 만 이용해 처리해줍니다.
remove에는 시간이 좀 걸릴 수 있으니 async await 비동기 처리를 해줍니다.
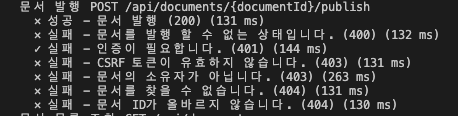
CSRF 토큰 체크 외의 모든 테스트는 통과했습니다! CSRF 는 뒤에 요건이 있으니 나중에 한번에 하기로 하고 이제 문서 발행을 보죠
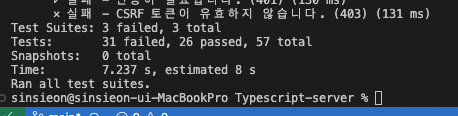
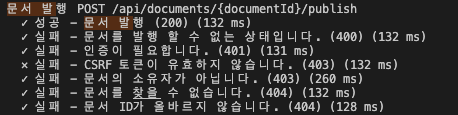
3-4. 문서 발행
DocumentController.publish 메소드를 구현하세요.
참가자들에게 문서를 발행합니다.
- 로그인 사용자이고 문서의 소유자만 호출할 수 있습니다.
- 문서가 CREATED 상태의 경우에만 발행할 수 있습니다.
- 문서의 상태를 PUBLISHED로 업데이트합니다.
- 문서 히스토리 타입을 PUBLISH로 저장합니다.
- 문서 참가자들의 상태를 INVITED 상태로 업데이트합니다.
- 참가자들의 히스토리 타입을 INVITED로 저장합니다.
methodpath
| POST | /api/documents/{documentId}/publish |
Param:
- documentId: 문서 ID
Response Body:
Exception:
- 인증 정보가 없는 경우 (401)
- 문서 ID가 올바르지 않은 경우 (404)
- 문서를 찾을 수 없는 경우 (404)
- 문서의 소유자가 아닌 경우 (403)
- 문서의 상태가 CREATED가 아닌 경우 (400)
발행의 경우 remove와 구조가 매우 흡사합니다.
document_id 를 받아 DELETED로 업데이트를 해줬던걸 문서는 PUBLISHED, 참가자는 INVITED로 변경해주면 됩니다.
//document.controller.ts
publish: Handler = async (req, res) => {
    if (!this.checkValidatedUser(req)) throw new UnauthorizedException();
    const { documentId } = req.params;
    if (!documentId || documentId === "not-found-document-id")
      throw new NotFoundException(); //문서 ID가 올바르지 않은 경우

    const document = this.documentService.readDocument(documentId);
    if (!document) throw new NotFoundException();
    if (req.session.email !== document.user_id) throw new ForbiddenException(); //문서의 소유자가 아닌 경우
    if (document.status !== "CREATED") throw new BadRequestException(); //문서의 상태가 CREATED가 아니면 에러를 뱉습니다.
    const result = await this.documentService.publishDocument(documentId);

    const partsResult = await this.participantService.publishByDocumentId(
      documentId
    );
    return result && partsResult;
  };
//document.service.ts
async publishDocument(id: UUID): Promise<boolean> {
const result = await this.documentRepository.publish(id);
return true;
}
//participant.service.ts
async publishByDocumentId(documentId: UUID): Promise<boolean> {
const result = await this.participantRepository.publish(documentId);
return result;
}//document.repository.ts
publish(document_id: UUID) {
const result = db
.prepare(
["UPDATE", this.tableName, "SET status=? WHERE id = ?"].join(" ")
)
.run("PUBLISHED", document_id);
return true;
}
//participant.repository.ts
publish(document_id: UUID) {
const result = db
.prepare(
["UPDATE", this.tableName, "SET status = ? where document_id = ?"].join(
" "
)
)
.run(["INVITED", document_id]);
return true;
}
얼른 CSRF를 해결하고 싶군요ㅎㅎ
3-5. 문서 목록 조회
DocumentController.getAll 메소드를 구현하세요.
문서 목록을 조회합니다.
- 로그인 사용자가 호출할 수 있습니다.
MethodURL
| GET | /api/documents?offset&size&status |
Query:
- offset: 페이징 처리 파라미터 (최솟값: 0, 최댓값: Number.MAX_SAFE_INTEGER 기본값: 0)
- 최솟값-최댓값 범위를 벗어나거나 값이 넘어오지 않았다면, 기본값으로 대체합니다.
- size: 출력할 아이템 개수 (최솟값: 1, 최댓값: 5, 기본값: 5)
- 최솟값-최댓값 범위를 벗어나거나 값이 넘어오지 않았다면, 기본값으로 대체합니다.
- status: 문서 상태 (기본값: none)
Response Body:
{
  "success": true,
  "response": {
    "documents": [{
      "id": "05a05180-c6bb-11eb-b8bc-0242ac130003",
      "title": "계약서",
      "content": "매우 긴 내용",
      "status": "CREATED",
      "participants": [{
        "id": "b24aee27-1c6c-4294-a4fa-49cf11ea442f",
        "name": "참가자",
        "email": "email@example.com",
        "status": "CREATED",
        "createdAt": "2021-06-10T10:00:00.000Z",
        "updatedAt": "2021-06-10T10:00:00.000Z",
      }],
      "createdAt": "2021-06-10T10:00:00.000Z",
      "updatedAt": "2021-06-10T10:00:00.000Z",
    }, {
      ...
    }]
  },
  "error": null
}
Exception:
- 인증 정보가 없는 경우 (401)
getAll 메서드는 query로 offset(페이지 정보), size (아이템 개수), status (문서 상태 조건) 이 주어집니다.
우선 모든 문서를 조회한 다음 조건에 알맞게 짜집는 방법으로 해결할 수 있습니다.
//document.controller.ts
findAll: Handler = (req, res) => {
    if (!this.checkValidatedUser(req)) throw new UnauthorizedException();
    const OFFSET_MIN = 0;
    const OFFSET_MAX = Number.MAX_SAFE_INTEGER;
    const OFFSET_DEFAULT = 0;
    const SIZE_MIN = 1;
    const SIZE_MAX = 5;
    const SIZE_DEFAULT = 5;
    let offset = Number(req.query?.offset) || 0;
    let size = Number(req.query?.size) || 0;
    let status = req.query?.status || "none";

    if (!offset || offset < OFFSET_MIN || offset > OFFSET_MAX)
      //최솟값-최댓값 범위를 벗어나거나 값이 넘어오지 않았다면, 기본값으로 대체합니다.
      offset = OFFSET_DEFAULT;
    if (!size || size < SIZE_MIN || size > SIZE_MAX) size = SIZE_DEFAULT;

    let documents = this.documentService.readAllDocument(); //모든 문서를 읽습니다.

    documents = documents.splice(offset * size, size); //페이지와 아이템 개수에 따라 자릅니다.

    if (status !== "none") //status 가 none 이 아니면 조건에 맞는 아이템만 가져옵니다.
      documents = documents.filter((doc) => doc.status === status); //status 조건

    return documents;
  };
//document.service.ts
readAllDocument(): DocumentRaw[] {
return this.documentRepository.selectAll();
}
//document.repository.ts
selectAll() {
const result: DocumentRaw[] = db
.prepare(`SELECT * FROM ${this.tableName}`)
.all();
return result;
}
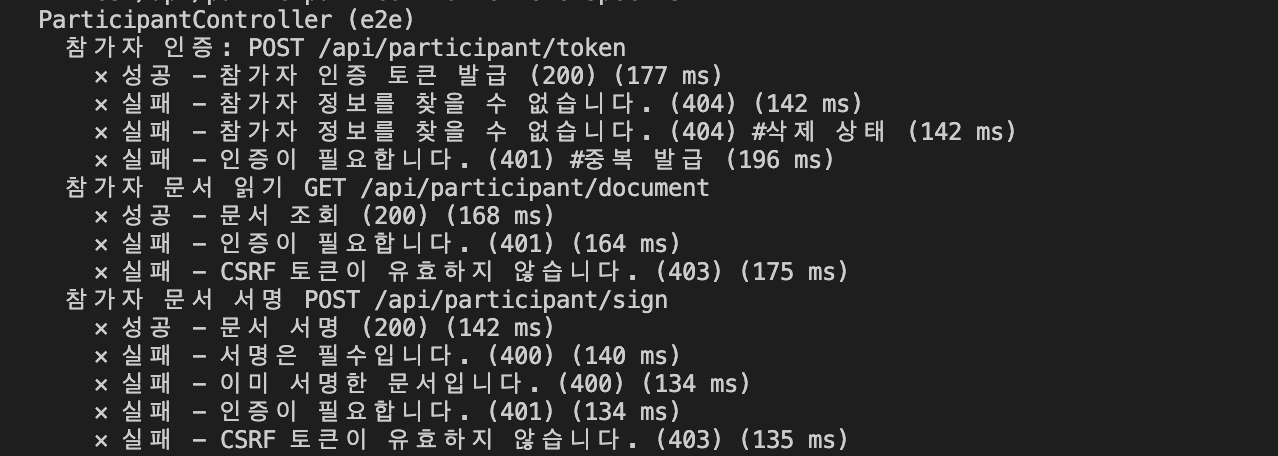
3.6. 참가자 문서 읽기
ParticipantController.readDocument 메소드를 구현하세요
DB에서 문서를 읽어서 리턴합니다.
- 참가자 인증 사용자만 호출할 수 있습니다.
- 참가자 히스토리 타입을 READ_DOCUMENT로 저장합니다.
MethodURL
| GET | /api/participant/document |
Response Body:
{
  "success": true,
  "response": {
    "document": {
      "id": "05a05180-c6bb-11eb-b8bc-0242ac130003",
      "title": "계약서",
      "content": "매우 긴 내용",
      "status": "PUBLISHED",
      "createdAt": "2021-06-10T10:00:00.000Z",
      "updatedAt": "2021-06-11T10:00:00.000Z",
    }
  },
  "error": null
}
Exception:
- 참가자 인증 정보가 없는 경우 (401)
참가자 인증 정보 역시 사용자 인증 정보와 마찬가지로 request 의 header에 authorization 필드가 있는지 체크를 하면 됩니다.
또한 request 에 session을 찍어보면 참가자의 이메일이 들어있습니다. 이 값으로 participants 테이블에서 참가자를 찾고 이 참가자 객체의 documentId 값으로 문서를 찾으면 됩니다.
//participant.controller.ts
readDocument: Handler = (req, res) => {
    if (!req.headers.authorization) throw new UnauthorizedException();
    const { email } = req.session;
    const participant = this.participantService.findByEmail(email); //이메일로 참가자를 찾습니다.
    const document = this.documentService.readDocument(participant.documentId);
    return { document };
  };

//participant.service.ts
findByEmail(email: Email): Participant {
    return this.participantRepository.findByEmail(email);
  }
3.7. 참가자 문서 서명
ParticipantController.sign 메소드를 구현하세요.
참가자가 문서에 서명합니다.
- 참가자 인증 사용자만 호출할 수 있습니다.
- 서명은 필수입니다.
- 참가자 서명을 저장하면서 상태를 SIGNED로 업데이트합니다.
- 참가자 히스토리 타입을 SIGN로 저장합니다.
MethodURL
| POST | /api/participant/sign |
Request Body:
{
  "signature": "sign",
}
Response Body:
{ "success": true, "response": true, "error": null }Exception:
- 참가자 인증 정보가 없는 경우 (401)
- 서명이 없는 경우 (400)
- 이미 서명한 문서인 경우 (400)
request의 body에 signature 값이 있는지 체크합니다. 그리고 session에 있는 이메일로 참가자를 찾은 다음 상태값이 "SIGNED" 이면 400 에러를 뱉습니다. 그 뒤에 서명 프로세스를 진행합니다.
//participant.controller.ts
sign: Handler = (req, res) => {
    if (!req.headers.authorization) throw new UnauthorizedException(); //인증정보가 없다면 401 에러를 뱉습니다.
    const { signature } = req.body;
    const { email } = req.session;
    if (!signature) throw new BadRequestException(); //서명이 없으면 400 에러를 뱉습니다.
    const participant = this.participantService.findByEmail(email);
    if (participant.status === "SIGNED") throw new BadRequestException(); //이미 서명을 했다면 400 에러를 뱉습니다.

    return this.participantService.sign(email);
  };
//participant.service.ts
async sign(email: Email): Promise<boolean> {
const result = await this.participantRepository.sign(email);
return result;
}
//participant.repository.ts
sign(email: Email) {
const result = db
.prepare(
[
"UPDATE",
this.tableName,
"SET signature = ?, status=? where email = ?",
].join(" ")
)
.run(["sign", "SIGNED", email]);
return true;
}
거의 다 왔습니다 !!
다음 글에서는 보안 관련 요건과 구현하지 못했던 부분들 추가적으로 분석해서 작성해보겠습니다.
'Back-End' 카테고리의 다른 글
| Learn Golang - Chat Service (0) | 2024.03.30 |
|---|---|
| [Nodejs] 프로그래머스 우리싸인 API 서버 개발 과제분석[3] (2) | 2023.08.06 |
| 프로그래머스 우리싸인 API 서버 개발 과제분석 (0) | 2023.08.05 |
| es6 문법으로 refactoring하기 (0) | 2023.07.30 |
| [Linux Centos] offline 환경에서 redis 설치하기 (0) | 2023.06.17 |


